Photography
Instructions for Natural Leaders
Review the text below. In class, take pictures throughout the day. You can bring in your own camera, or borrow an instructor's.
Introduction
They say a picture is worth a thousand words.
Today most people have great cameras on phones in their pockets most of the time. If you start practicing now, you will gradually learn to take great pictures.
Photography can be a powerful form of storytelling, capturing vivid moments. You can use photos in many ways, like: to create art, document your life, share moments on social media, communicate what your business does, and to educate.
There are 3 main purposes for photography in this program:
- Photojournalism: to document activities and give parents a glimpse of the what students are up to. Most photos will serve this purpose.
- Promotional photos. A minority of photos.
- For students to learn photography skills! So some miscellaneous, purely artistic & nature photos are also welcome.
Photojournalism: documenting our day
Parents are interested to know what their child was doing and experiencing, so from that perspective, they will appreciate representative shots of their children even if it's not remarkable from an artistic point of view.
So try to get some shots of everybody, especially when they are highly engaged in an activity or having a great time. This takes special effort, because certain people are naturally more flashy and attention-grabbing, while other people are more camera shy. Try to be respectful and inconspicuous (or at a minimum, not obnoxious!) in taking pictures.
Some students may prefer to pose for you, rather than to have candid shots taken, which is fine.
Group shots are also good in this regard, but try to be as close as practical to still capture the group.
Candid group shots that tell a story can be great in this regard.
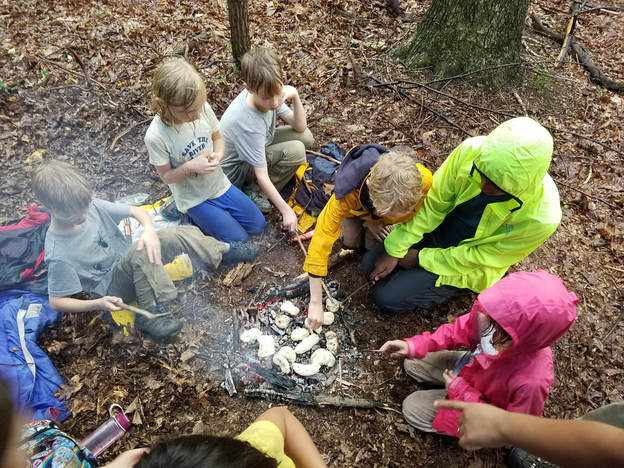
Photojournalism example 1. High-angle story shot

High angle shot by lifting the camera as high as I could reach. Advantage: captures the scene. Disadvantage: no faces, less emotional impact.
Action - you can see people manipulating the ash cakes with hands and sticks, and someone pointing.
Many people - you can see half the class.
Captures the story of the moment - the smoke, the fire, the mood, the dampness
Filling the frame - the subject is students preparing ash cakes on a rainy day. The subject is framed by the woodland that wraps around the students, and this helps set the context of the events depicted.
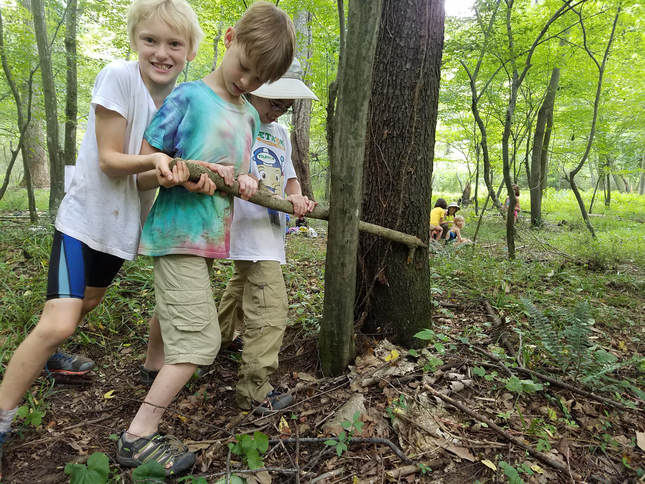
Photojournalism example 2. low-angle, story shot
|
Low angle - Camera looks up at faces.
Filling the Frame - Students take up half the photo. Off-center - Main focal point is top left, but our eye is also led down to right. Action shot - We observe/learn how to break a big stick. Semi-candid - One person faces camera, but not posed per se. Depth - Figures in foreground and stick leads eye back to people in distance. Emotion - The proximity & low angle allows us to see the smiles and gives the picture more emotional impact. Promotional potential - This shot shows kids happily working together on a skill in an interesting way, so it could be effective for promotional use. |
Promotional photography
|
A small fraction of pictures may be used on the website or a flier (etc.) to attract future families to the program.
Effective photos communicate what students do and experience in the program. Usually the best photos are close-ups with either or both of the following: 1) Vivid positive emotion 2) A skill/action/activity Take a look at the slideshow on the homepage for some examples. Check out my flier on the right. The pictures show the thrill of achievement (1st bow-drill coal), survival shelter, and having fun with mud and water. In each case it illustrates a happy student and a program skill or activity. In each case the focal points are off center, and extraneous detail cropped out. Notice that text is minimal - just enough to convey what is offered, an impression of who Nick is, and where to learn more. The photos do most of the talking! Similarly, billboards and magazine ads often feature just a compelling image with a brand name. |
Your browser does not support viewing this document. Click here to download the document.
|
Using the Camera
Take horizontal shots - hold the camera horizontally when taking photos or videos.
Hold the camera still - you, and the camera should be motionless, or the shot will be blurry. Use both hands, and rest your elbows against your body for greater stability (especially when filming).
Focus and lighting - tap on the subject of your photograph with your finger, so the camera focuses on that spot, and to adjust the lighting/contrast.
Avoid burst mode! - Make sure to just tap the button -- don't hold the photo button down or the camera will enter burst mode and may take 50 - 100 shots in the space of a few seconds!
Composition Tips
Fill the frame - Every picture has a subject. You want to capture the subject without anything extra or distracting. Sometimes the subject may be the landscape, or people within the landscape. Other times it will be just an individual face or person, or small group. It may be the action of carving, or fishing, etc.
Get down low - Get close to the ground, or sometimes up high, to get interesting perspectives.
Capture actions - Show the movement that is central to your subject.
Key activities - Shots that capture the activity, in an interesting way.
Check out this link for more tips on good composition: http://www.exposureguide.com/top-10-composition-tips.htm
More photos of interest

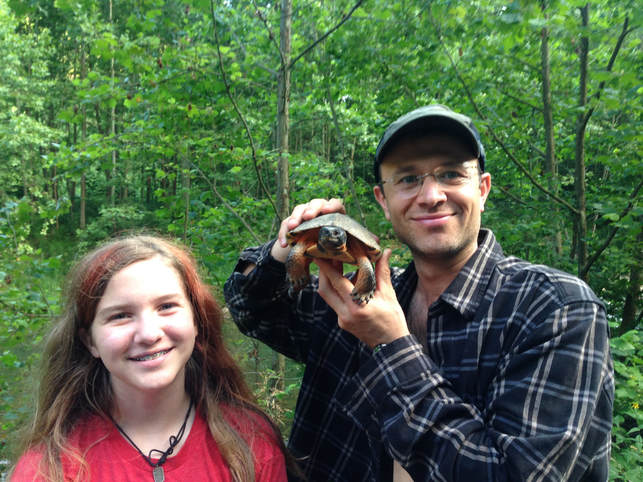
This is a fun posed shot.


